I’m confident that after reviewing this page and the linked resources, you will have;
- Decided whether you’re ready to start beekeeping.
- Be ready to take your first step in your beekeeping journey.
You’re not going to learn all there is to know. Heck…I’m still learning every day.
But you will walk away confident in your decision to build your honeybee colony. So, let’s get started!
Is Beekeeping Right For You?
You don’t want to spend time and money setting up a beehive only to find that you don’t have all needed to sustain a colony.
Run through the following questions and be critically honest when answering;
- Do you enjoy nature? Including following weather patterns, learning about local animal species, and being outside in hot or cold temperatures.
- Are you passionate about maintaining and growing bee populations to protect local and worldwide ecology? Including non-honeybee populations?
- Are you okay with investing money into maintaining your hives without the possibility of harvesting honey or earning cash from harvested honey?
- Are you okay with investing year-round time and labor to support your colony’s needs?
- Are you allergic to honey, bee stings, pollen, beeswax, pests, or the plant life supporting a colony?
- Do you have physical limitations that might prevent you from carrying out colony care tasks, i.e., lifting 60+ pounds of equipment or hives?
- Are you committed to following your local and state apiary regulations?
- Have you corresponded with neighbors to make them aware of or received approval for your beekeeping plans?
- Are you open to working with your local beekeepers and beekeeper associations?
- Are you committed to consistently learning and improving?
If any of these questions raise concerns, please take ample time to address them before building your colony. I also recommend reviewing our article on how difficult beekeeping is. Click the image below.
Timing Your Introduction To Beekeeping
As you’ll find out soon enough, there are honey harvesting seasons and a beekeeping calendar that will influence the timing of your introduction to beekeeping.
Typically, you’ll want to purchase your bees and introduce them to their new hive and habitat in the spring, so their pollination efforts help the local ecology.
This means preparation is needed to ensure you have all the knowledge, beekeeping equipment, and supporting tools to begin your beekeeping journey.
We recommend starting this effort in the fall. That way, you have plenty of time to learn the basics, take a beekeeping class, develop a plan/calendar, talk with your local beekeeping association, and order your beekeeping supplies.
Learning The Beekeeping Basics
One of the most common issues a new beekeeper may face is a lack of experience and knowledge about properly caring for a honey bee colony. This can lead to problems such as poor hive management, inadequate nutrition for the bees, and a lack of understanding of the bees’ behavior and needs.
This cannot be overstated.
Please invest heavily in your beekeeping education early on, and you’ll feel much more confident as you begin your beekeeping journey.
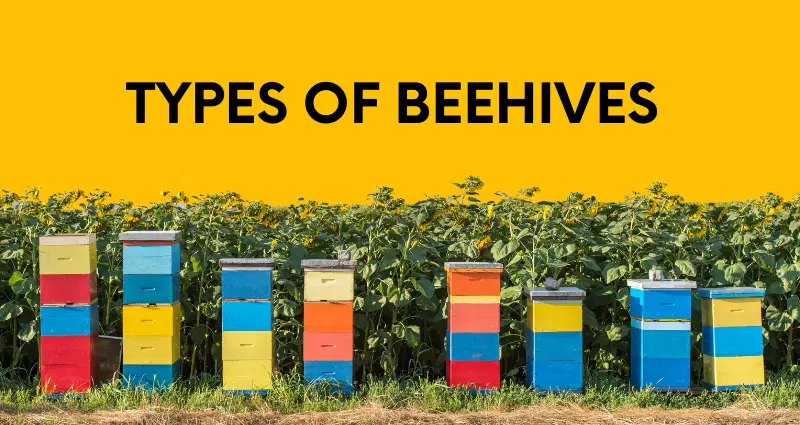
Take time to understand the history of beekeeping, how bees make honey, bee anatomy, life cycle, diet, habits, habitats, hive types, standard practices, regional nuances, safety measures, local laws, equipment needs/uses, etc…
Click the images below to learn more:
The colony you build deserves a caretaker that will ensure they thrive, so the last thing you want is to be unprepared or ill-informed.
What follows below are my recommendations on where to start;
1. Beekeeping Books To Order
Start by ordering a number of the top beekeeping books.
If you’re going to pick just one right now, go with The Beekeeper’s Handbook by Diana Sammataro and Alphonse Avitabile.
It’s perfect for new beekeepers, while experienced beekeepers continue to reference it.
NOTE: There is a lot of great information available in these books, online, and throughout the beekeeping community. There are also many opinions, nuances, and learning still to be done. Be sure to do your due diligence to recognize what is a fact vs. what is an opinion.
2. Tap Into Your Local Apiary Community
Successful beekeeping doesn’t have to be a lonely pursuit. Many groups want to see you succeed, from your local beekeeping association, beekeeping clubs, fellow beekeepers, the surrounding community, and your local/state government agencies.
Even if you feel confident in your knowledge and approach, I recommend chatting with others in your area. You never know what else you might learn and what friends you might make.
Not sure where to get started, though? Here are a few directories to look into;
- Find A Local Beekeeper Directory
- American Beekeeping Federation
- State By State Beekeeping Organizations – US & Canada Only
- State By State American Honey Producers Association
3. Check Local Laws
Until 2010, beekeeping was illegal in New York City. You incurred a $2,000 fine if you were caught with illegal hives. Nowadays, in almost every US city, beekeeping is legal. However, most cities require you to register your hives.
You can find all the information you need by contacting your city’s Beekeeping Association, calling your state’s Department of Agriculture, or checking your government website.
Including how many hives you can have per acre, how many bees, and how far away from public streets your apiary needs to be.
Choose The Right Hive Habitat Location
Once you’ve discovered how many hives you can legally keep, it’s time to decide where to place them. Once you’ve installed your bees, you don’t want to move the hive. Here are a few fundamental tips to follow.
- Easy access
If you keep your bees near an area you like to spend time in, you are more likely to notice if something is wrong. Additionally, not forcing a hike upon yourself each time you need to access the hive is a favor in itself. - Shade vs. sun
While hives in sunlight seem more productive, you don’t want to risk your hive overheating. On the other hand, keeping them in the shade makes the hive more susceptible to mold, diseases, and hive beetles. Finding a middle ground is vital based on the average temperature where you live. - Southeast-facing entrance (in the Northern Hemisphere)
The coldest winds come from the north. Facing your hive towards the south will help keep it warm and make it easier for them to enter and exit, even on a windy day. Additionally, because the sun rises in the east, the heat of the day will wake up the bees earlier, and, in turn, they will have longer, more productive days. - Food and water
To continue mimicking their natural environment, you should place your hive near food and water sources that naturally attract the bees. A man-made water station closest to the hive should be shallow and clean. The ideal pollination station will be free of pesticides and within six miles of the hive. Both food and water sources should be free of everyday foot traffic.
If your neighbors are skeptical about having hives of bees next door, share this article with them. Bees have been villainized in our society, much like sharks have.
Budget
Beekeeping requires an initial investment of approximately $700. Luckily, most of these initial purchases will last you throughout your beekeeping journey. Here is a glimpse into what you can expect to spend for each crucial piece of equipment.
Hive
Depending on the type of hive you choose, your investment will vary. A two-box Langstroth hive costs about $180, while the Classic Flow Hive costs $649.
It is recommended to begin beekeeping with two hives. You’ll be able to compare the progress of each hive and try different methods, and of course, if you lose one hive, you can continue your journey without starting from zero.
You’ll need to spend time getting to know the different parts of your hive body. From the queen excluder, brood box, honey super, and more.
Equipment
Some pieces of equipment are non-negotiable. You’ll need three essential tools: a brush, a hive, and an uncapping tool.
The hive tool is the most versatile— you can use it to open the hive, separate boxes, and scrape off extra propolis. You can buy these three tools for approximately $35 in total.
Beekeeping Suit & Protective Gear
Most beekeepers choose a white suit, but the color is up to your discretion.
A bee suit should have deep and durable pockets, breathability, comfortable and flexible gloves, a properly fitting veil, and easy washing instructions. On average, a beekeeping suit costs $50.
Bees
It is possible to buy individual and entire bee colonies locally, but most new beekeepers purchase them commercially. You can buy a nucleus colony (nuc) or packaged colony.
We will get into that later, but the average price for a three-pound package of bees is $110. A nuc will set you back about $200.

Miscellaneous
Investing in other tools and accessories will make your life easier. Consider a hive stand, a queen excluder, a feeder, a smoker, and a honey extractor.
*Keep in mind that beekeeping kits are also available. Kits are the easiest and most cost-efficient option. You won’t get to hand-pick each item, but you will save approximately $200.
Choosing a Hive
The hive you choose as a first-time beekeeper depends on several factors. Consider:
- The number of bees you plan to integrate.
- The amount of honey you expect the hive to produce.
- Your strength and physical abilities.
- The amount of space you have for the hive.
- How much interference you are okay with causing in the hive?
- How much time do you have to maintain the hive?
Langstroth Hive
The Langstroth is the most common hive in the US. It is a collection of boxes, also known as supers, stacked on top of each other. It forces the bees to build upwards, which isn’t natural, but it is an excellent choice for commercial beekeeping.
Most beekeepers use Langstroth frames with a foundation, meaning that the bees can focus more on honey production than building a structure. Frames with a foundation are compatible with a honey extractor. Foundationless frames will require you to use the old crush and strain method. The design of this hive allows you to remove each frame individually to check progress or harvest.
Because of its popularity, finding replacement parts and advice about the Langstroth hive is easy. One negative aspect is that you will significantly disrupt the bees during an inspection by removing all the heavy upper boxes, weighing between 60 and 100 pounds each.
Warre Hive
Designed to mimic a hollow tree, the Warre hive makes bees feel at home. Instead of using frames, this hive uses top bars. Because of this, you can only harvest boxes, not individual frames. Warre hives produce about half of the amount of honey as Langstroth hives.
After harvesting a box from the top, you must add a new box to the bottom of the stack. Luckily, you will only need to do this once a year, and a full box is only about 30 pounds each, but you’ll need some muscle nonetheless.
The Warre hive is a great choice if natural beekeeping is your goal. You can even harvest the honeycomb and use it for other side projects.
Top Bar Hive
Instead of a vertical system, like the other two options, the top bar hive is a horizontal system with approximately 25 bars, ten or more of which will be used by the queen for the brood.
It is raised off the ground and requires no leaning or heavy lifting. However, this hive produces the least amount of honey compared to the Warre and Langstroth hives.
The combs hang freely, and you need to handle them delicately. The design allows for cross-combs, making the harvesting process more tedious. This hive requires more inspections, but they’re easily done and minimally invasive. One of the major downfalls of this option is that it can not be expanded.
This is only an introduction to the three most popular types of beehives. There are multiple other options, including the Flow Hive, Dome Hive, Hex Hive, Horizontal Hive, and more.
*Remember, all hives should be placed on dry, level ground.
Ordering a Bee Colony
Just like people, there are different types of honey bees. The six most popular races are:
- Italian bees
- Carniolan bees
- Caucasian bees
- German black bees
- Africanized bees
- Buckfast bees
Depending on your climate, you’ll want to choose a specific type of bee.
Once you’ve settled that, you need to find a reputable seller. Once again, asking for advice from your local apiary community will help significantly. Remember that the temperatures are usually too warm to ship bees when summer arrives. Schedule your bee delivery for the beginning of spring.
Package of Bees vs. Nucleus Colony
| Package of Bees | Nucleus Colony |
| $110 on average | $200 on average |
| Can be shipped | Can’t be shipped |
| The colony hasn’t accepted the queen | Worker bees and queen bees already know how to work together |
| Easy to install in any type of hive | Difficult to install in Warre or Top Bar Hives |
| Bees must start from scratch when introduced to the hive | Arrives with frames or brood and honey stores |
| Bees may abscond after installation | Easy installation for the beekeeper and bees |
| Must be ordered well in advance of the season | Can be ordered later in the season |
Installing the Bees
Every beekeeper has their method of installing bees. I have found that bees are calmer at night so installing them in the evening is best.
If you want to slow the bees down before introducing them, you can slightly spray them with sugar water; however, this step is optional. Here is the method that has worked well for me.
- After changing into protective clothing, remove five frames from one side of the brood box.
- Remove the plywood cover of the bee package and tap the box to encourage the bees to move toward the bottom of the box.
- Remove the sugar feeder to access the queen cage. You may need to use your hive tool to pry the feeder from the wall.
- Take a moment to inspect your queen bee. Make sure she is alive and note some of her features. You’ll need to be able to spot her easily throughout your beekeeping journey, so be sure to learn what the queen looks like and practice your queen-spotting skills.
- Remove the plug from the queen cage to expose the candy. Place the queen between two of the remaining frames in the box, towards the center of the box. The cage should have a hook of some sort that allows you to secure her there easily.
- Pour the bees into the hive.
- Carefully reinsert the frames and close your hive.
While it will be difficult to resist, do not check on your bees for a few days. Doing so may irritate them, cause them to leave the hive, or even reject their queen. After four or five days, open the hive to ensure that the queen has been released; if she has not, help her.
Finally, decide which food source you will use to get the bees started in their new hive. They will enjoy frames with honey or syrup until they’ve built up their own reserves.
Common Issues Beekeepers Face
Varroa Mites – Every hive will have a few mites in it. The bees are strong enough to take care of a few, but you’ll need to step in if the problem gets out of control.
If you are okay with using pesticides in your hive, they will help prevent your hive from an infestation. Other methods include using a sticky screened bottom board, planting thyme (a natural varroa mite repellant) near your hive, or “dust bathing” your bees in powdered sugar (without cornstarch added).
Swarming – Ensure that your bees always have enough room to avoid swarming. Add another box or harvest a few frames if the hive becomes too congested. Read more here on swarming habits.
Robbing – If you see hairless bees, hear a louder buzzing noise than usual, or see wasps near your hive, it may be under attack. You must intervene as soon as possible to save your colony. To prevent this from happening, be sure not to drop any honey or sugar syrup near the exterior of the hive. When there is a nectar shortage, other bees will hunt for hives to rob.
Dead or Missing Queen – If the population of your hive has fallen, if there is minimal brood and eggs, if you have laying workers, or if there’s a noticeable change in the temperament of your bees, you may be queenless. While the bees may find a new one on their own, you must closely monitor the situation and consider purchasing a new queen bee.
Bee Stings – As a beekeeper, you will endure your fair share of bee stings. Wearing your protective gear is one of the best ways to avoid bee stings. Additionally, bees sting when they feel threatened. Keep your calm when you are around them, and move gently. If you do get stung, remove the stinger as soon as possible, clean the sting spot with soap and water, ice it to stop the swelling, and consider taking Benadryl.
Final Thoughts
Remember that you will probably not be able to harvest honey within the first year of installing a hive. A colony needs approximately 75 pounds of honey or about nine full honey frames to survive the winter.
Without harvesting in the first year, you’ll increase the likelihood of your bees surviving the winter and most likely have a surplus of honey in the next beekeeping season.
Keeping bees is a fulfilling and possibly lucrative hobby. The most significant learning curve is finding the delicate balance between keeping an eye on your bees without invading their space too often.
I hope this guide has been helpful to you, new beekeepers. Be sure to review our other articles to learn much more!
